How to Make Maple Pecan ...
The aroma of freshly baked bread combined with the rich scent of maple syrup and toasted pecans is heavenly. Each bite of these sticky buns is an exquisite harmony of soft, pillowy dough and the perfect balance of sweetness and nuttiness. The process of baking these buns from scratch is an experience in itself, rewarding you with not only heavenly bites but also the satisfaction of creating something truly special.
Ingredients
For the Dough:
- 3 and 1/4 cups all-purpose flour
- 1/4 cup granulated sugar
- 1 packet active dry yeast
- 1/2 teaspoon salt
- 1/2 cup whole milk
- 1/4 cup water
- 1/4 cup unsalted butter
For the Filling:
- 1/2 cup unsalted butter, softened
- 1/2 cup packed brown sugar
- 1 tablespoon ground cinnamon
For the Maple Pecan Glaze:
- 1/2 cup unsalted butter
- 1 cup packed brown sugar
- 1/4 cup pure maple syrup
- 1 cup chopped pecans
Creating the Magic:
Prepare the Dough– Mix flour, sugar, yeast, and salt in a bowl. Heat milk, water, and butter until warm, then add to the dry mixture. Knead until smooth, then let it rise until doubled.
Roll and Fill– Roll out the dough into a rectangle. Spread softened butter over it and sprinkle it with brown sugar and cinnamon. Roll it into a log and slice into buns.
Make the Maple Pecan Glaze– Melt butter, brown sugar, and maple syrup in a saucepan. Pour the mixture into a greased baking pan and sprinkle with chopped pecans.
Combine everything and Bake– Place the sliced buns over the glaze in the pan. Let them rise again, then bake until golden and caramelized.
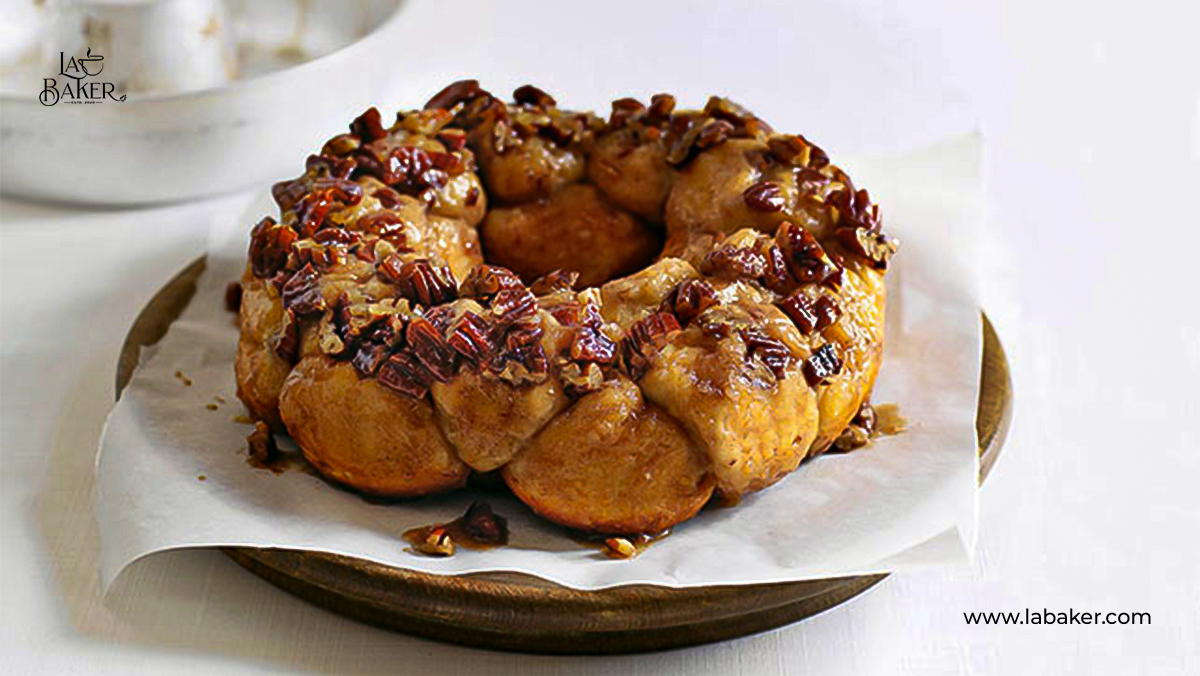
Invert the pan onto a serving platter, letting the gooey glaze cascade over the buns. Take a moment to appreciate the masterpiece you’ve created.
Enjoy after cooling.
Expert Baking Tips
- Bake the buns until they’re golden brown and the glaze is bubbling. This ensures a caramelized, sticky topping.
- When inverting the pan onto a platter, do it carefully and quickly to ensure the glaze fully coats the buns.
- When placing the sliced buns in the pan, leave a little space between them to allow for rising during the second proof.
Explore More of My Recipes
End Note
Baking is an art that brings joy to both the creator and those fortunate enough to enjoy the results. The process of crafting these gooey treats, from kneading the dough to watching the glaze cascade over the buns, is a labor of love that transforms in a truly satisfying experience. Following the recipe properly you will be happy to have the results.
Frequently Asked Questions
1.Can I use instant yeast instead of active dry yeast?
Yes, you can use instant yeast instead of active dry yeast. However, you might not need to proof instant yeast before using it in the recipe.
2.Can I make the dough ahead of time and refrigerate it overnight?
Yes, you can prepare the dough the night before, let it rise, and then refrigerate it. Bring it to room temperature before proceeding with rolling and baking.
3.Can I use a different type of nut for the topping?
Absolutely, you can customize the recipe by using different nuts like walnuts or almonds for the topping.
4.What if I don’t have a stand mixer for kneading the dough?
You can knead the dough by hand. It might take a bit more effort, but the end result will be just as delicious.
Sorry, the comment form is closed at this time.
